Making gadget is always the task programmers do in their daily routine for business time or personal dictations. There are number of categories of gadgets available on internet where various of websites scatter them out under free version or sometimes it costs users before to use in their desired device. Gadgets for Android, iPhone, Tab, PC, Macintosh, Mobile, etc devices have the highest demand on internet basically in terms of download issue. For websites tons of gadgets being nested everyday and those are being publicized by programmers also. But a platform like Blogger they have a gigantic list of dynamic gadgets and offer users to submit any kind of gadget to directory. Experts can easily create gadget also newbie take part in this range of developing gadgets. At the end of hours someone becomes to get his/her gadget being approved by Blogger and get listed on Gadget directory.

Now that if you can create quality gadgets and submit them for blogger review also get approved then you have chance to get tons of new visitors also dofollow backlinks to your business or personal blog or site. Today by this article i'd show you all the basic blogger gadget structure, how to create and submit to blogger gadget directory in order to get both backlink and traffic.
Basic Structure of Blogger Gadget
The basic structure of blogger gadget is as like as your blog's xml template but here number of Preference commands are used in order to make the gadget blogger templates compatible. Let's begin by the scrutinized cores of blogger gadgets structure
<?xml version="1.0" encoding="UTF-8"?>
This line begins as to initialize the gadget as an xml document also blogger can understand it as xml format although the file will include html, javascript etc. codex
<Module>...</Module>
The tag which covers the entire funtions of blogger xml gadget basically- Gadget title
- Require fatures
- Content
- Userprefs
<ModulePrefs
This tag covers the second most important features of your gadget like- Gadget title: title="Recent Visitors"
- Gadget description: description="Lists the recent Visitors to your site"
- Gadget author: author="Karthik"
- Author email: author_email="manikarthik84@gmail.com"
- Directory title: directory_title="Recent Visitors"
- Gadget thumbnail: thumbnail="http://xmlgadgets.com/ig/img/recent.png"
- Gadget screenshot: screenshot="http://xmlgadgets.com/ig/img/recent_.png"
<ModulePrefs title="Recent Visitors" scrolling="true" description="Lists the recent Visitors to your site" author="Karthik" author_email="manikarthik84@gmail.com" directory_title="Recent Visitors" thumbnail="http://xmlgadgets.com/ig/img/recent.png" screenshot="http://xmlgadgets.com/ig/img/recent_.png">
<Require
This tag explains blogger the how it will look and feel when installed on a template, it's compatibility and available configurations by a user from blogger gadget directory. Here's how it can be written<Require feature="opensocial-0.8"/>All above are the features of this gadget we're about to learn by this tutorial. These tags are must and required for any xml blogger gadget otherwise your gadget will not be approved by blogger gadget directory. At least your gadget should include two option lines after
<Require feature="views"/>
<Require feature="dynamic-height"/>
<Require feature="friendconnect"/>
<Require feature="minimessage"/>
<Optional feature="skins"/>
<ModulePrefs<Require feature="opensocial-0.7"/>
<Require feature="google.blog"/>
<UserPref
These tags used to allow users to give input to gadget functions and accordingly you will see output at the front page of your blog. The more functions your gadget can perform the more you can call for UserPref commands but these are not mandatory for any gadget in blogger only advanced users can build gadget using these tags
<Content type="html" view="default">
The body of a Gadget or you can say the heart of a gadget is Content type either it may be written in HTML or JavaScript or both.As we're all familiar with blogger template development, so you can remember when you develop any part of your template you are to customize any of
- The Stylesheet
- Particular HTML code
- JavaScript Code or
- Any special tags
<style>Likewise your blogger gadget will be written simply when you can add
// Your blog stylesheet
</style>
<script>
// Javascript here
</script>
<div>
// HTML code here
</div>
<style tag <script<div tag according your preference.Remember that the Content type will be more complex if you want your gadget to be more advanced.
</Module>
The terminating tag which wraps your entire code of gadget likewise </html tag in blogger templateFinally how blogger gadget looks like
<?xml version="1.0" encoding="UTF-8"?>Note: We used
<Module>
<ModulePrefs height="300" title="BlogSocial">
<Require feature="opensocial-0.7"/>
<Require feature="google.blog"/>
<Require feature="skins"/>
<Require feature="views"/>
//You can add more ModulePrefs Here
</ModulePrefs>
<UserPref>
//Allows users to give input to gadget according to functions
</UserPref>
<Content type="html">
<![CDATA[
HTML/JavaScript Content Goes Here
]]>
</Content>
</Module>
<![CDATA[ so that blogger could understand that not all the codes are XML but HTML, JavaScript within Content type. Your HTML code will be parsed in order to assure the gadget being performed well on maximum webkit browsers.Now Tryout Yourself
Now it's time for yours to create your own blogger gadget, for your ease we will show you how you can do thatCopy and paste following xml code in a .xml document and save it.
This is a simple blogger gadget works to enable Subscription feed for blog posts
<?xml version="1.0" encoding="UTF-8"?>1. Now upload the file on a web server, for test drive you can use Google code, Drive or Google cloud.
<Module>
<ModulePrefs
title="Subscribe to Posts Feed">
<Require feature="opensocial-0.7"/>
<Require feature="google.blog"/>
</ModulePrefs>
<Content type="html">
<![CDATA[
<script type="text/javascript">
function getFeedUrl() {
document.write("<a href='" + viewFeeds.getPostsFeedUrl() + "'>Subscribe to Posts<\/a>");
}
var viewFeeds = new google.Blog(getFeedUrl, window.name);
</script>
]]>
</Content>
</Module>
2. Track the location of your uploaded document
3. Go to blogger > Page Element
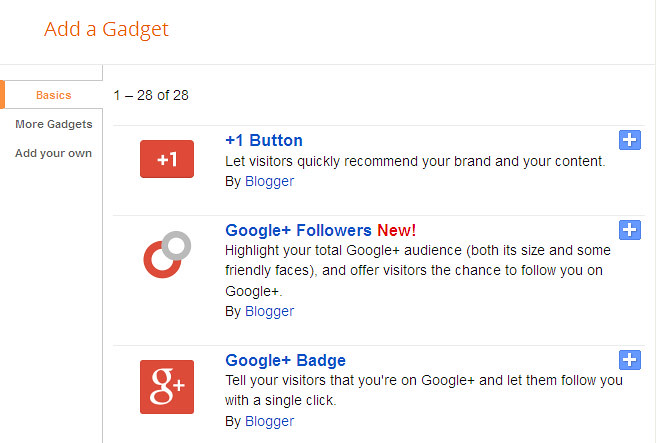
4. Click "Add a Gadget"
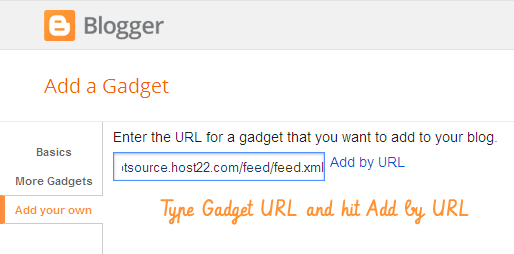
5. Now click Add your Own
6. Paste the URL of your XML gadget and Hit "Add a gadget"

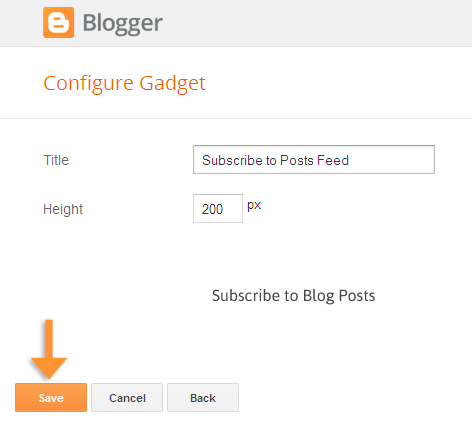
7. You will see following preview and you can change the width of your gadget

8. Finally hit save and you can place the gadget any location of your template
Submit Your Own Gadget to Blogger
Now that you know how to create your own custom blogger gadget with appropriate styling and functions. Once you have created your own gadget for blogger you can submit it for review to blogger if they approve your gadget you would lucky chance that blogger will convey your gadget to millions of blogger users and you can popularize your personal blog or site even you you will get lots of unique visitors and dofollow backlinks from millions of blogs those who will use your gadget.
To upload your gadget to blogger go to Blogger gadget uploader
Now type the same URL you used to upload your gadget before
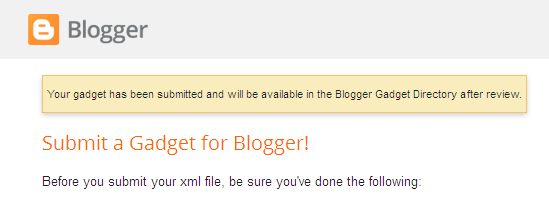
Hit submit and you will following notification

Do You Need More Info.
I think i have explained enough about blogger gadget structure and how you can submit your gadget to blogger easily. Even a newbie can tryout this formula to sharpen their coding knowledge. Once you can make a simple gadget you could a make a dynamic gadget the next day and be popular within millions of blogger users.
If you have extra more queries you can directly ask me i would suggest you, help you to make your work done. Have a nice day... pals :)


0 comments