Payoneer is a world class payment services provider connecting over 200+ countries and top of the leading internet based companies make transaction super easy with the of help its virtual US Payment services which is deserved by every cardholder.
In today’s eCommerce business Payoneer has played a great role by making an interaction between companies, marketers and customers across the globe. The feature has made Payoneer more influential is providing Automatic Clearing House (ACH) for making deposits to Payoneer cardholders who reside outside US and doesn’t have US bank account.
Not only these are the prime benefits working with Payoneer but also you can get much more premium powerhouse of assists for making your internet based businesses deals upon great border of success.

![How to Get Payoneer Account Approved [Step by Step Guide with Pictures]](https://blogger.googleusercontent.com/img/b/R29vZ2xl/AVvXsEiCN9ip_PRf4d6LNYHHfgbBXH_J-KqbxogND9q2FiXgeh4VjQ3pYqpiQtChC42iUty-qGyA-fA8Po1Qd0nqCfMdTbBjI6_5itphBu5Nu0U9CZCrzPkyGPLl1TbMBVpbNjirLdy-blI5Hgvr/s1600/How+to+get+payoneer+account+approved.jpg "How to Get Payoneer Account Approved [Step by Step Guide with Pictures]")
Before getting you up the main processes you may want to know what is Payoneer and how it works?
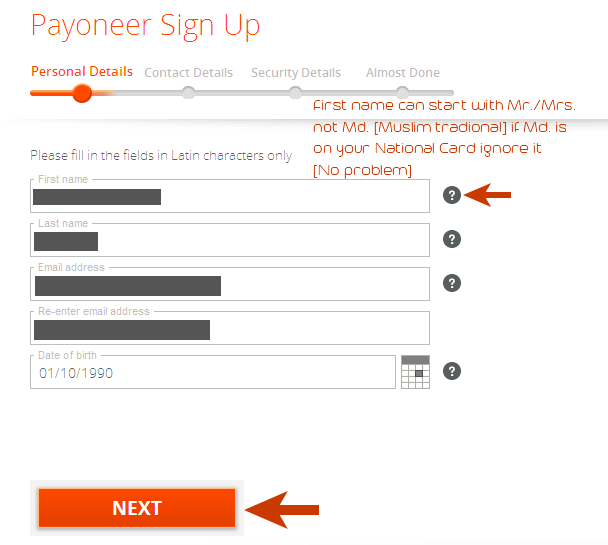
Now on the first step you have to fill out your personal details. Just fill it according to your existing documentation (National ID, Driving License, or Passport). Here is a highlight of correct personal details input
Note: If you sign up with this link you will get $25 deposited to your Payoneer account after activating your Payoneer Prepaid Debit Master Card

Email Address: Your personal email address which you want to use with Payoneer account
Date of birth: This is important to use your correct date of birth which appears on your National ID card, Passport of Driving license.
Click on “Next” to proceed on second step
Street address: Most important setup is this. The street address exactly means your Home address which may include your House No. Road No. Post Office. Etc. in short.
Make sure you input your Home address that exactly appears on your National ID card, Driving License or Passport.
Remember that you can type only 30 characters on each row for filling up Street address if your address exceeds 30 characters then your application will be declined.
Hint: To write your street address within 30 characters use a character counter tool for writing your home address appropriately.
City: The city which appears on your National ID card
Postal / Zip code: Type Postal code or Zip code that appears on your National ID card
Choose one from these options and type your regular and current mobile phone or landline number.
Now click on “Next”
Password: Type a secured and strong password with alpha numeric characters (Don’t forget to note it down on a word pad for instant recalling)
Security Question: Pick any of your favorite security questions and type its answer.
Now click on “Next”
Type your National ID Number and tick other three options
Finally click on “Submit” button
Note: Before submitting you may want to review your application such that you can make edition further before final submission of application.
After applying for Payoneer Master Card, head to your email provider and sign in your email account.
Now you will see Payoneer team has sent you two different notification messages:
Notification #1 − A simple guide of getting started with Payoneer services with most important your Cardholders Name username and your reference number on Payoneer system on the bottom side of message

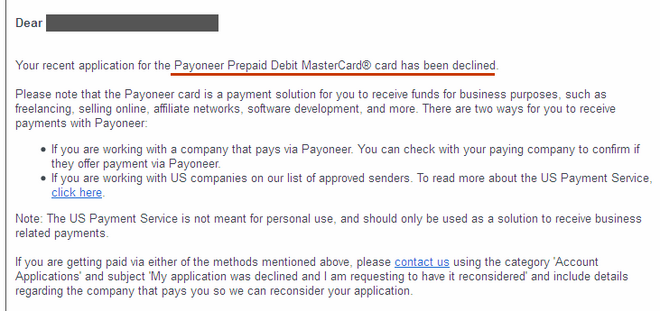
Notification #2 − Your recent application for the Payoneer Prepaid Debit Master Card has been declined due to any of the reasons provided.
Now what you can do? Don’t worry, you can resolve this problem yourself just follow the steps below:
First of all note now your Cardholder Name username and your reference number on Payoneer system on a notepad which will be used further to contact Payoneer team
Now go to this page to submit a ticket notifying Payoneer team about your problem with recently created Payoneer account
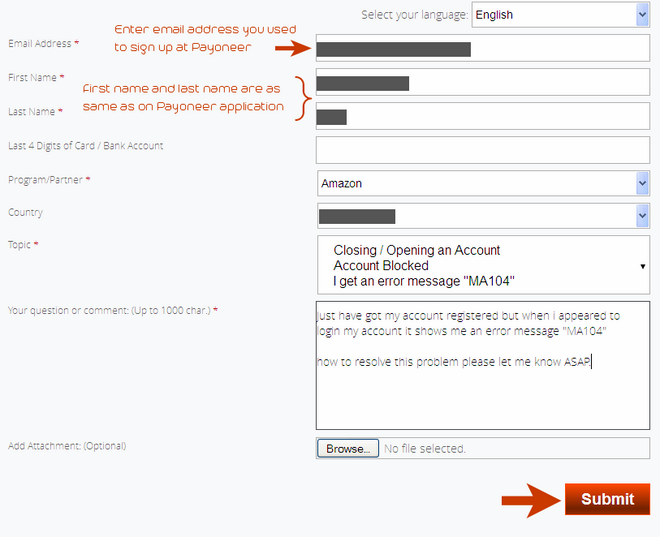
Now you’re on ticket submission form so fill it securely with following suggestions:
Email Address: Enter the email address you used to create your Payoneer account
First Name: First name is that you used to written on Payoneer application form
Last Name: Last name should be the same you written on Payoneer form
Program/Partner: Choose any of the program partners you intend you get fund to your Payoneer account
Country: Your country name
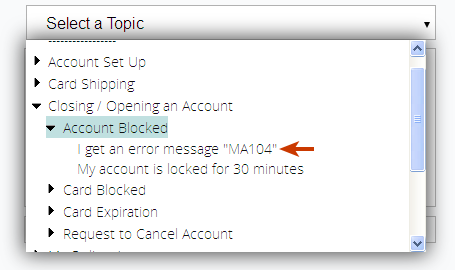
Topic: Click on the topic −> Closing / Opening an Account −> Account Blocked −> I get an error message “MA104”
Your question: Now type your question with clear English that can reflect your trouble of Payoneer application. You can write that you have got an error message while signing in your Payoneer account and it shown up a “MA104” error message.
And of course at the end of your question must write your
Add attachment: You can take a screen shot of signing in trouble of your Payoneer account and attach it
Finally click on “Submit” and this part is done!
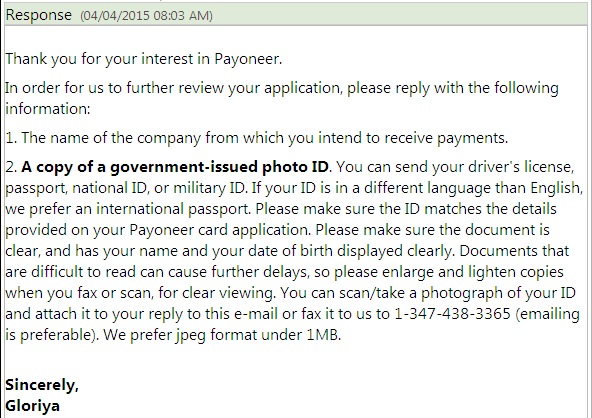
After 3 – 4 business days Payoneer team will contact you regarding following credentials to want you provide them two information: (1) the name of the company from which you intend to receive payments. (2) A copy of a government-issued photo ID. You may want to read following messages as example
So I responded the Payoneer team with following messages adding my valid National ID Card. See below image.

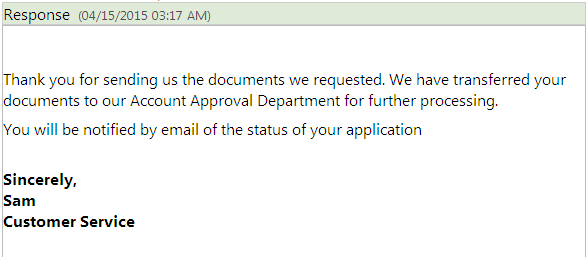
One of the Payoneer customer service providers responded me that my documents have been transferred to Payoneer Account Approval Department for further processing. See below image
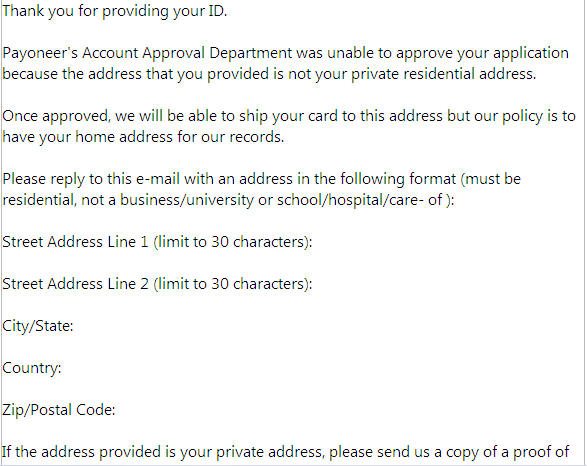
After 3 – 4 business days one of Payoneer customer services has replied me that they’re unable to approve my application right now because the street address I have provided with my application doesn’t match the exact street address which is on my National ID card so they finally gave me another chance to fill up another correct street address which reflects my Home town (permanent address which appears on my National ID card) not any temporary address, not any School / College or / University care of. See below image as example
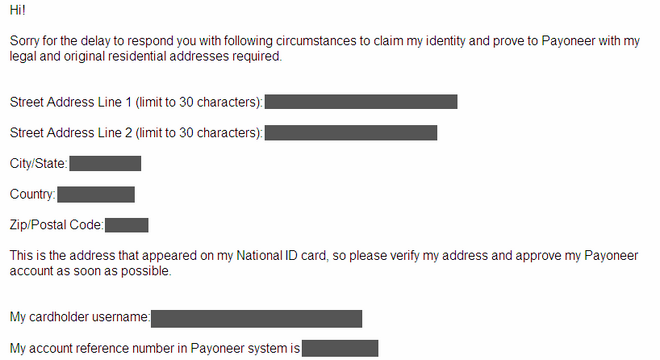
So I filled another “Street address” with 30 characters and sent them immediately.
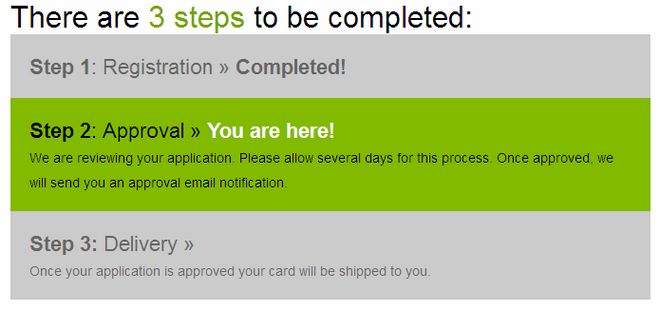
After 3 – 4 business days I have got my Payoneer application approved. See approval notification message that I received.
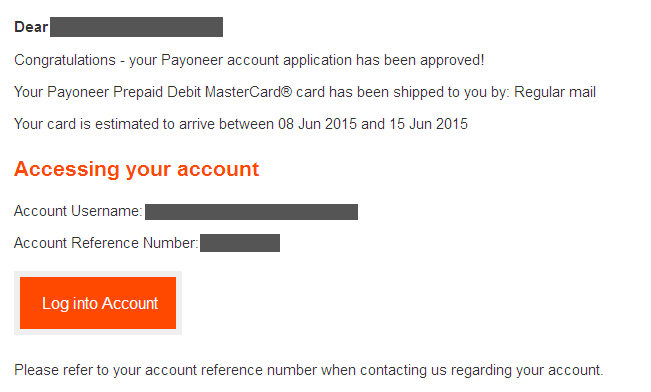
Now I have successfully logged in My Payoneer account (though I didn’t get my card shipped to my address because it will arrive right between the dates of 8 June – 15 June, 2015.)
If you wait for manual account verification by Payoneer team then it may be required you more than 1 – 2 months but with instant communication with the Payoneer anyone can get their account verified and approved by Payoneer.
Thanks everyone for reading and don’t forget to share this article with your friends who suck in getting Payoneer account approved.
In today’s guide I would be discussing how you can get a Payoneer account approved within only 15 days and get your card shipped by a month after creating account.
Before getting you up the main processes you may want to know what is Payoneer and how it works?
Sing-up For Payoneer Debit MasterCard
First of all Go to Payoneer official site and click on “Sign Up” button to get you up startedNow on the first step you have to fill out your personal details. Just fill it according to your existing documentation (National ID, Driving License, or Passport). Here is a highlight of correct personal details input
Note: If you sign up with this link you will get $25 deposited to your Payoneer account after activating your Payoneer Prepaid Debit Master Card
Personal Details:
First Name/Last Name: This should start with Mr. / Mrs. Designation but if your ID card doesn’t bear this type of designation (may be Md. for Muslim religion) then ignore adding Md. before your first name and then add your last nameEmail Address: Your personal email address which you want to use with Payoneer account
Date of birth: This is important to use your correct date of birth which appears on your National ID card, Passport of Driving license.
Click on “Next” to proceed on second step
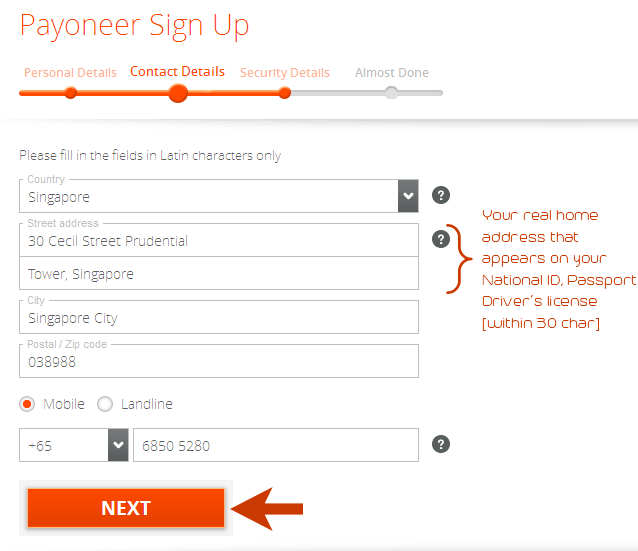
Contact Details:
Country: Type your countryStreet address: Most important setup is this. The street address exactly means your Home address which may include your House No. Road No. Post Office. Etc. in short.
Make sure you input your Home address that exactly appears on your National ID card, Driving License or Passport.
Remember that you can type only 30 characters on each row for filling up Street address if your address exceeds 30 characters then your application will be declined.
Hint: To write your street address within 30 characters use a character counter tool for writing your home address appropriately.
City: The city which appears on your National ID card
Postal / Zip code: Type Postal code or Zip code that appears on your National ID card
Choose one from these options and type your regular and current mobile phone or landline number.
Now click on “Next”
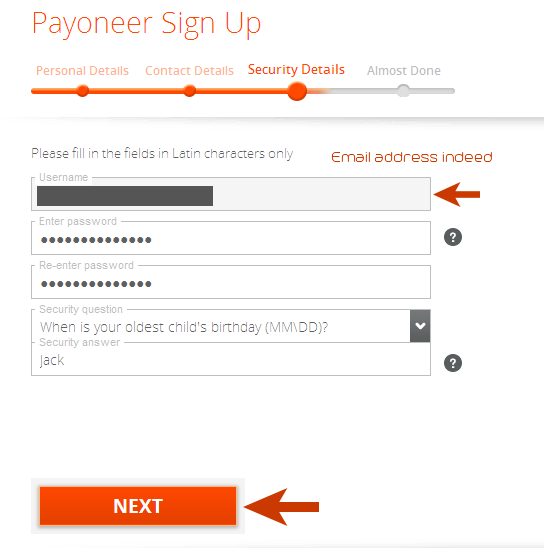
Security Details:
Username: This is your email address you used on step 1Password: Type a secured and strong password with alpha numeric characters (Don’t forget to note it down on a word pad for instant recalling)
Security Question: Pick any of your favorite security questions and type its answer.
Now click on “Next”
Almost Done:
Here you have to choose your identity verification method i.e. National ID card, Passport or Driving License right now if you have any of these documents then use it.Type your National ID Number and tick other three options
Finally click on “Submit” button
Note: Before submitting you may want to review your application such that you can make edition further before final submission of application.
After applying for Payoneer Master Card, head to your email provider and sign in your email account.
Now you will see Payoneer team has sent you two different notification messages:
Notification #1 − A simple guide of getting started with Payoneer services with most important your Cardholders Name username and your reference number on Payoneer system on the bottom side of message
Notification #2 − Your recent application for the Payoneer Prepaid Debit Master Card has been declined due to any of the reasons provided.
Now what you can do? Don’t worry, you can resolve this problem yourself just follow the steps below:
First of all note now your Cardholder Name username and your reference number on Payoneer system on a notepad which will be used further to contact Payoneer team
Now go to this page to submit a ticket notifying Payoneer team about your problem with recently created Payoneer account
Now you’re on ticket submission form so fill it securely with following suggestions:
Email Address: Enter the email address you used to create your Payoneer account
First Name: First name is that you used to written on Payoneer application form
Last Name: Last name should be the same you written on Payoneer form
Program/Partner: Choose any of the program partners you intend you get fund to your Payoneer account
Country: Your country name
Topic: Click on the topic −> Closing / Opening an Account −> Account Blocked −> I get an error message “MA104”
Your question: Now type your question with clear English that can reflect your trouble of Payoneer application. You can write that you have got an error message while signing in your Payoneer account and it shown up a “MA104” error message.
And of course at the end of your question must write your
Cardholder Name username:Both you these things you have copied earlier from your email.
Your reference number on Payoneer system:
Add attachment: You can take a screen shot of signing in trouble of your Payoneer account and attach it
Finally click on “Submit” and this part is done!
After 3 – 4 business days Payoneer team will contact you regarding following credentials to want you provide them two information: (1) the name of the company from which you intend to receive payments. (2) A copy of a government-issued photo ID. You may want to read following messages as example
So I responded the Payoneer team with following messages adding my valid National ID Card. See below image.
One of the Payoneer customer service providers responded me that my documents have been transferred to Payoneer Account Approval Department for further processing. See below image
After 3 – 4 business days one of Payoneer customer services has replied me that they’re unable to approve my application right now because the street address I have provided with my application doesn’t match the exact street address which is on my National ID card so they finally gave me another chance to fill up another correct street address which reflects my Home town (permanent address which appears on my National ID card) not any temporary address, not any School / College or / University care of. See below image as example
So I filled another “Street address” with 30 characters and sent them immediately.
After 3 – 4 business days I have got my Payoneer application approved. See approval notification message that I received.
Now I have successfully logged in My Payoneer account (though I didn’t get my card shipped to my address because it will arrive right between the dates of 8 June – 15 June, 2015.)
Now it’s your Turns:
I hope you have understood how to get Payoneer account approved within few correct steps and by only 15 days how you can get your application verified by Payoneer team.If you wait for manual account verification by Payoneer team then it may be required you more than 1 – 2 months but with instant communication with the Payoneer anyone can get their account verified and approved by Payoneer.
Thanks everyone for reading and don’t forget to share this article with your friends who suck in getting Payoneer account approved.


Amazing Post Many of my readers had asked me to let them know about payoneer creating procedure but now because of less time I will tell them about you...
ReplyDeleteLearn to create Payoneer and Varify PayPal at http://www.mastfun4u.com/2014/12/create-payoneer-and-verify-paypal.html
Thank you Waheed for appreciation and sharing this post with your blog readers. Do let me know if you have any query.
DeleteI love this post. It is very helpful for me. Thank you so much for helping me resolve my issue. Waiting for another one.
ReplyDelete