So you want to get started your email marketing startup with Feedburner because you already have created a blog under your favorite niche and you decided to capture emails of your target audience. It's not the case for you but also for many people who are now ignoring Feedburner once they started with Feedburner on primary level of their blogging journey. The thing is that Feedburner is not any old blog content syndication service but some of its features are dull and gloomy as compared to advanced level email marketing as supposed to Aweber, Mailchimp, iContact, MailGet etc. services.
There are quite some drawbacks still suck Feedburner to deliver publishers the better user experience which meet their businesses. Due to having lots of bugs still hundreds of thousands of blog publishers give priority to Feedburner to capture emails and deliver blog content because of its free services and you could be one of them.


Feedburner is also popular in syndicating podcast (I will write a detail guide about Feedburner for podcast up next blog) and let people subscribe your podcast from iTunes and other platforms.
In today's Guide I have written a simpler article to begin with Feedburner as a starter user and drag the ultimate uses from its services.
1. Create a Feedburner Account
It’s easy to create a Feedburner account for you blog. Feedburner allows two types of feed formats Atom and RSS feeds. You can create feed for your blog content or podcast to let your readers subscribe your blog feed syndication service. So in this step you will learn how to create a Feedburner feed for your blog content.First of all head to Feedburner and login with your Google account
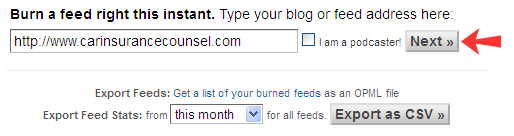
In this step you will have to tyep your website or blog URL and click on “Next”
Now Feedburner has discovered two feed URLs for your blog (i.e. Atom and RSS), choose one to burn your blog content.
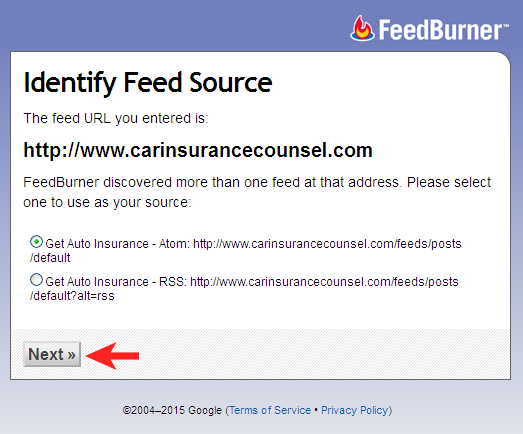
Note that Atom feed is more rich-featured allows any XML markup no matter what kind of blog content you publish (rich media, video, audio, images, animations etc. materials) as opposed to RSS feed which is old feed format can only read plain text or escaped HTML markup and have very much downfalls in its diversity. To know more about Atom vs. RSS feed read this article.
For this tutorial purpose I chose atom feed and clicked on “Next”
The Feed Title is already fetched from your blog title or you can change the name if you want. The Feed address is also fetched from your Feed Title but you can also change this address to make your Feed URL more targeting and recallable.
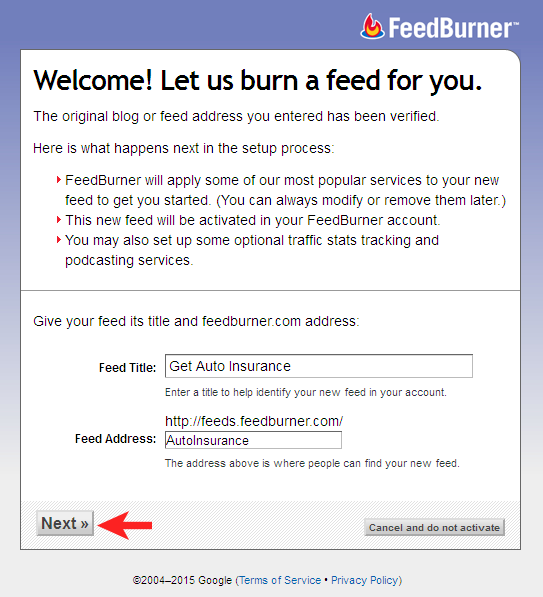
Once you have changed Feed Title and Feed Address now click on “Next” to proceed
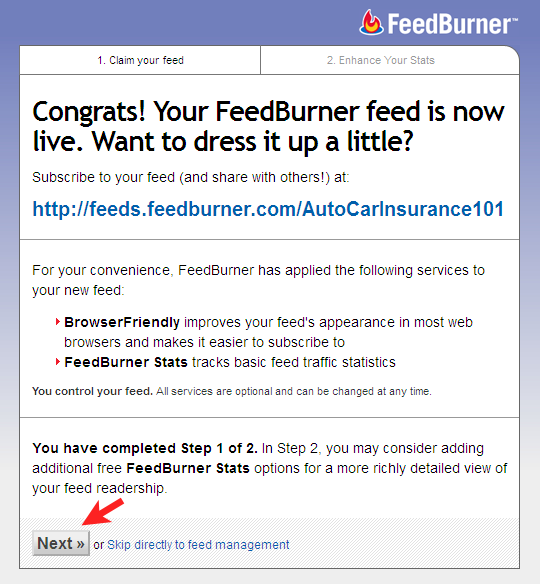
Congrats! You have successfully created your own FeedBurner feed account for your blog now it’s time to manage your account for more productivity and usefulness. So click on “Next” to proceed.
Your Feedburner account is almost created and the Feedburner has done some regular works to make your feed advance. But you can also enable some additional features for getting more insights from your Feed.
Click on “Clickthroughs” to track how often people click items back to your site, Itemenclosed downloads (for podcast downloads as I didn’t enable podcast so I skipped this option) and the third option is tracked to get more detailed Feedburner stats.
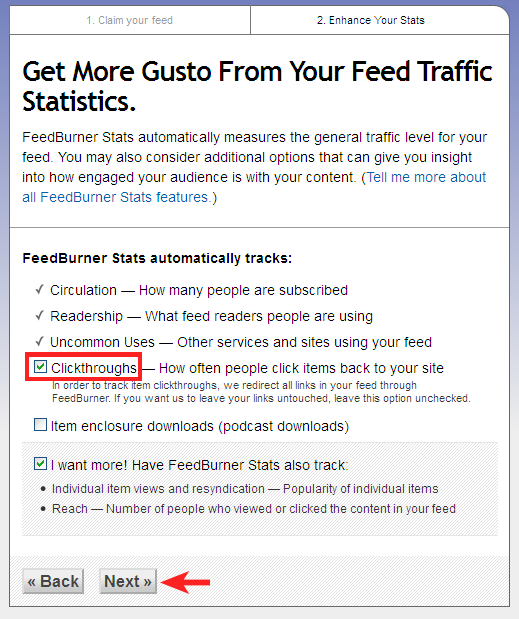
Once you chose your advanced Feed tracking options then click on “Next” to proceed.
Now you’re on your Feedburner account management dashboard, here you will learn how effectively you can use Feedburner to get more out of its services.
2. Feed Settings
Edit Feed Details: In this option you can modify your Feed Title, Original Feed address and custom Feed address. The Feed Title can be changed as it has very less impact on your entire Feed but you should not change original and custom Feed address if you don’t permanently move your site to another domain.You may want to change the length of your Feed when you show it on a HTML version by increasing/decreasing the value at the end of Original feed.
After changing it please click on “Save Feed Details” to let Feedburner affect these settings on your Feed.
Delete Feed: If you don’t want to continue with this Feed then you can simply remove this Feed from your Feedburner account. To do so click on “Delete Feed” and check “With permanent redirection” to permanently remove your Feed. Then click on “Delete Feed” and you have successfully deleted your Feed for your blog.
Transfer Feed: You may want to permanently transfer your Feed address to another Feedburner Publisher who has the same Feedburner account. To do so click on “Transfer Feed” and type the email address where you want to transfer your Feed then click on “Send Transfer Acceptance Request”. This may take up to 72 hours for Feedburner to contact the publisher to accept this new Feed address.
3. Analyze Your Feed
Feed Stats: Feedburner offers an inbuilt tracking and optimized Feed statistics dashboard to analyze your Feed condition with currently subscribed readers. Here in this option all you can get about your Subscribers lists, total reach for that day, views vs. clicks on articles, subscribers locations, uncommon usages of your feed and much more.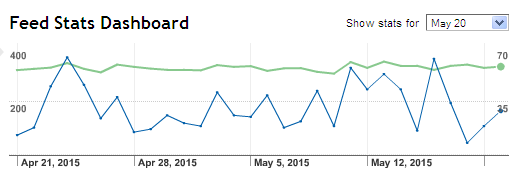
To track any of the insights simply click on link and you will be presented more elaborate details of your Feed stats.
What are Uncommon Uses? – How to get rid of this issue?
Feedburner manages hundreds of thousands of feeds to syndicate content on varieties of platforms which can be email clients, web-based feed aggregators, news filters and more each outlined on Analyze tab on your Feedburner account dashboard. Besides these Feed tracking known places there are still some uncommon places where your blog Feed can be syndicated without your consent, this may be called as blog spam.When any uncommon use of your Feed is tracked, Feedburner shows it on your main Analyze page tab to notify you about this event. Read this Google's guide to know more about Feedburner Uncommon Uses
As content republication is a Google’s policy violation to webmaster guidelines even to Bing webmaster guidelines, so what can you do to protect your blog Feed fresh, legal and original?
Below are some effective and actionable steps to keep your blog Feed original and out of all illegal and uncommon uses.
- Add Creative Commons to Feedburner RSS Feed
- Submit your blog post to Google, Bing after publishing it on your blog
- Contact the content scrapper who used your Feed without giving you proper credits and warn him to stop syndicating content otherwise you will file a DMCA against his blog.
4. Optimize
FeedFlare: The FeedFlare option gives your Feed maximum boost throughout social sharing and social bookmarking. Each time you publish post on your blog it will go live on your Feed and FeedFlare will add custom sharing buttons to further share your content with social networking sites.To make FeedFlare more robust you can do following:
On your Feedburner account click on “Optimize” and choose “Feed Stats”
Now you can see Feedburner has enabled some common buttons for bookmarking and social sharing, you can enable more options such as: Comments Count (Blogger), Comments Count (Self hosted WordPress), View Creative Commons License (A creative commons license will be added below posts in Feed) etc. options.
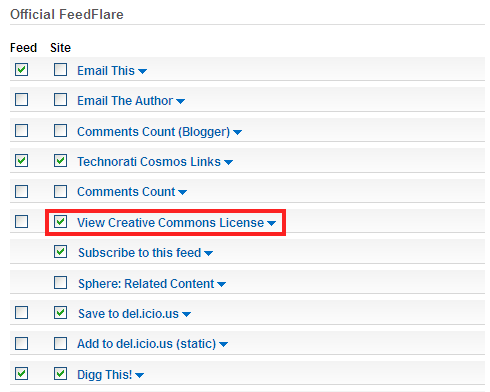
To mange and order your FeedFlare buttons just scroll down the page a little where you can see “FeedFlare Preview/Ordering”. Now order your buttons one after another.
Finally click on “Save” button you’re done!
Publicize:
Headline Animator: Create a customized animated headline banner (custom size banner) and add it to your blog to attract more audience to read your content. To add a customized headline banner do following:
Navigate on “Publicize” and choose “Headline Animator”
Now make following changes to create a productive headline banner that matter your readers.

Finally click on “Save” button and you will be directed on widget adding page.
Now choose your platform of blog (Blogger, WordPress, TypePad, or MySpace Page) and click on “Next”
The further options are very easy to add headline animator widget on your blog, just follow the successive steps which are familiar to you.
BuzzBoost: This option can be used to generate recent posts from your blog and embed the widget on your blog with a simple JavaScript code. To do so you just need to following these steps:
Click on “BuzzBoost” under “Publicize” and you have options to customize your Feed Settings. To make your recent post feed as simple then turn off/uncheck all the settings under “Feed Content to Display” and click on “Save”. But you can make your “BuzzBoost” more robust by enabling specific options that matter your readers and business.
After setting up “BuzzBoost” you will be provided a custom JavaScript code which you will have to add as a widget on your blog. Choose your blogging platform from the dropdown lists and click on “Go” to add it on your blog. The further options are much easy if you’re familiar with your blogging platform.
Email Subscription: Most important setup in every email marketing campaign. Feedburner also allows you to enable Email Subscription to let your visitors subscribe your email lists to get personalized email as blog content directly in their inbox. To enable this option just do following:
Click on “Email Subscription” under “Publicize” and choose your language as subscription form (default as English).
Now copy the code that starts with <form tag and add this code as widget on sidebar of your blog (best position for every email subscription form).
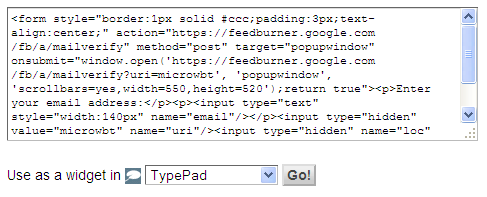
Also you can add the widget on your blog if it’s Blogger, TypePad then choose your platform and click on “Go”
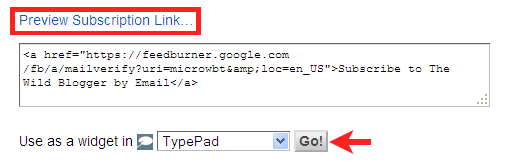
You can also add a link of Email subscription to your blog just scrolling down the page and head to “Subscription Link Code”.
Now choose your blogging platform and add the widget on your blog.
Finally click on “Save” and you're done!
FeedCount: This setup allows you to generate animated Feedcount button which you can add on blog to show you current email subscription lists in order to attract more people to subscribe your email lists. To do this simply following these steps:
Navigate to “Publicize” and choose “FeedCount”
Now customize your feedcount button by picking different colors as text and body.
Finally you will see an HTML code also the demo “Checklet”
You can add the HTML code manually on your blog or add the widget using their dropdown button to choose your blogging platform and click on “Go”
The further steps are as simple as your did earlier for other similar setups.
Finally click on “Save” to enable this option for your Feed.
Socialize: Do you know you can automatically tweet your followers of your blog content generated by Feedburner using Socialize options. This is a free service to ping your blog content to Twitter once your connected your Twitter account with Feedburner and enabled Socialize options. The steps are guided below in simple ways:
First of all you have to add a Twitter account by clicking on “Add a Twitter Account” then login your Twitter
account and authorize app to allow Feedburner tweet your blog feed on behalf of you.
After adding Twitter account to “Feedburner” head to “Formatting Options” and make following changes which can produce you more robust tweet.

Finally click on “Save” and you’re ready to tweet your first blog content ever to your twitter followers.
Creative Commons: By enabling his service you can keep your copyright but still this allows people to copy and distribute your work by providing proper credits to your blog and under the only conditions they can treat with your Feed you specified in this option.
Below image shows how you can create a custom “Creative Commons” button for your Feed
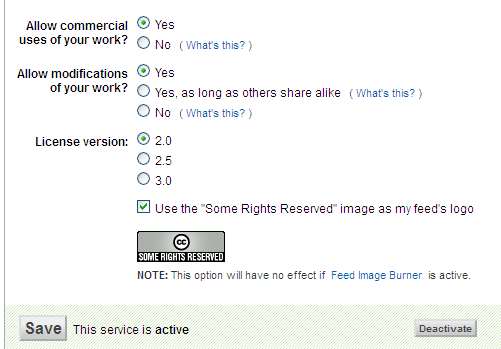
Finally click on “Save” and you’re done!
Note: This option will have no effect if Feed Image Burner is active.
5. Troubleshootize
This option contains some general tips and suggestions for quick fixing any malfunction across your feed. The Troubleshootize can be resyncable so that you can tell FeedBurner to sync your Feed for finding out any trouble if it confronts.So what's “Up Next?”
So these are all the general and needy setups for any Feedburner account to produce more robust feed that is expected. There are not so many drawbacks with Feedburner as I’m using this service since one and half years now, except one that is “inactive email subscribers”This usually happens when an interested user subscribes your email lists they typed their email address on the email subscription box and signed up for to your Feedburner email lists. They thought that they’re already in your email lists but still one more important step is left that is activating email feed request within 24 hours by clicking a link that Feedburner has sent him immediate right after signing up.
If the user is not much tech savvy then he is not aware about this setup and may not activate the link so you lost one valid subscriber. If this continues time after time with your email subscription then you will see only (30 – 40)% users are active with your email subscription and rest of the users are inactive.
You can’t do anything more just removing these users from your email lists. To know about your total email subscribers lists please do following:
Navigate to “Publicize” and choose “Email Subscription”
Scroll down the page a little bit and head to “Total Subscribers:”
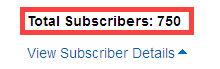
Click on the link “View Subscriber Details” and you will see your active and inactive subscribers.
I have in total 750 subscribers but half of these subscribers are inactive, may be these are all such type of email users who don’t read their email even one within a week or weekend, so rubbish users !!
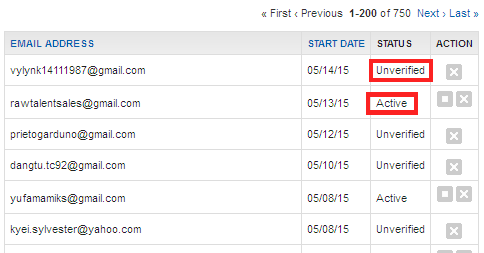
You may see this kind of scenario with your account so is there any option to let these people know about this event and aware them to active email subscription.
I have written another article of how to increase Feedburner email subscribes manually by sending them a custom email template. This worked for me and I have been able to activate 10% of my total inactive email subscribers and rest of the people are unreachable may be for their blocked email address.
So I think you have understood how to treat with email subscription with Feedburner and get maximum people subscribed to your lists.
If you get the article helpful don’t forget to share it with your blogger friends who are still working with Google’s FeedBurner.


0 comments