Google Forms is a complete giveaway from Google Drive which helps you plan events, send surveys, give students a quiz, or collect other information in an easy, streamlined way. Google Form is fully developed on HTML basics where it features like as PHP forms and it's an open source project for HTML practitioners. It's an importable survey form builder so you can easily create, edit and publish forms on your custom pages. Google drive gives you a big storage of 15GB data and you have a chance of building multiple apps with their services as it's a freeware web-based offer suite powered by Google Inc. During couple of past months Google drive has extended some dynamic
features in their form building tool which lets users to make perfect
and accurate forms in which field it will be availed.
Whatever quite great information we found now let's move on next our tutorial about how to create a basic contact form using Google drive and finally implement that form on blogger. Pretty cool, right not? So let's go ahead and build a contact form for your company website or blog within just some few steps.

Whatever quite great information we found now let's move on next our tutorial about how to create a basic contact form using Google drive and finally implement that form on blogger. Pretty cool, right not? So let's go ahead and build a contact form for your company website or blog within just some few steps.
New Features of Google Forms?
- Grid Question Type: Now you can quickly gather responses for a group of similar questions in a new, compact grid format. This format allows you to label a few columns and as many rows you like. The result of each row appears in systematic way onto spreadsheet column with its own summary chart
- Improved Result Summary Chart: You can polish up your results summary charts, with clearly formatting of statistics and better formatting of chart for each question type.
- Bi-Directional Language Support: The form editor now supports a feature like right-to-left(RTL) text input, which works in such way that when you enter RTL text in the form editor, it will automatically switch the directionality of the form editor and rendered forms (similar to Gmail and other Google Apps). This means your text and questions will flip directionality, making it easier for RTL users to create and use forms
- Supports Premium Themes: Now Google docs form build is more developed with a bunch of several stylish themes which let users to build their forms more dynamic even they can customize the design using an HTML editor.
- Source Code Re-Placeable: The source code is possible to place on any html template thus importing the entire html form with css stylesheet.
Create A Contact Form Using Google Drive
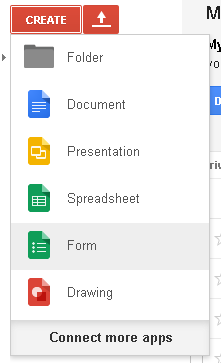
1. Go to Google Docs2. Click on Create button choose Form
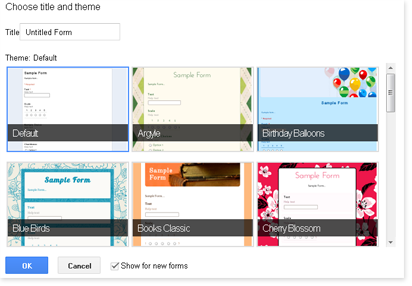
3. Now on the form builder you'll be asked to choose a theme
4. Choose it Default and hit Ok
5. There you should find an existing item
6. Remove it and click Add item
7. Choose a text item and give it a new name, for example we gave it as Email

8. Now take a few more text items and give names as Email, Country, Subject, Website respectively
9. Finally take a Paragraph text and give it name as Message Note: There are quite a list of items, but for test drive we chose text item only, another thing you may also set "required to fill" by checking Required question box
10. Thus you can add other more items (exactly what items you want to add with your form) to make a custom wise contact form
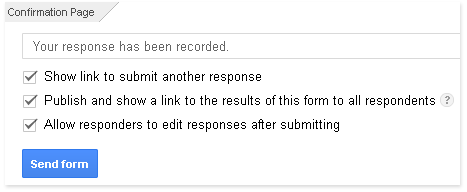
11. Now come to the confirmation page option there are 3 more options, just check them all and hit Send form button
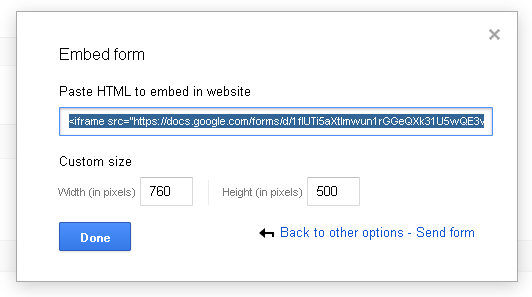
12. Now on popup hit Embed > Copy iframe tag and save it on a text document

13. Finally hit done and your contact form is built successfully
How To Embed Google Docs Form On Blogger
1. Once you copied your contact form iframe tag it should be in following format<iframe src="https://docs.google.com/forms/d/1flUTi5aXtImwun1rGGeQXk31U5wQE3vi3H70p3jkTgA/viewform?embedded=true" width="760" height="500" frameborder="0" marginheight="0" marginwidth="0">Loading...</iframe>2. You just copy the yellow highlighted code(not here in your iframe tag) and reload it opening a new tab of your browser
3. You could see your contact form with default style sheet. Now right click on your mouse and hit "View Page Source"
4. Now find out <form>....</form> tag and copy the entire code including <form>...</form>
5. Again save it on a text document
6. Now go to Blogger > Pages
7. Choose a new blank page and give a title like as Contact Us, Contact Form etc.
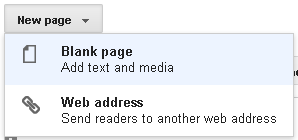
8. On post editor switch to HTML mode and paste the entire <form>..</form> code (that you copied earlier) on it
9. Don't publish it yet, create another blank page accessing your blogger account with new tab and give a title as "Confirmation"
10. Now write some appealing text to build a confirmation page also can add some hyperlinks to notify readers someways
11. Finally publish this page and copy its link URL
12. Now switch back to your Contact Form tab (which on html mode) and add the following script above <form tag
<script type="text/javascript">13. Simply replace CONFIRMATION PAGE URL with your confirmation page URL that you copied earlier
var submitted=false;
</script><iframe id="closed_iframe" name="closed_iframe" onload="if(submitted){window.location='CONFIRMATION PAGE URL';}" style="display: none;"></iframe>
One thing you need to do yet:
14. Your <form tag includes onsubmit and target attributes likewisetarget="_self" onsubmit=""15. Simply replace them with below code
onsubmit="submitted=true;" target="closed_iframe"16. Finally publish post and check it and you should find it working accurately
Change Email Notification Location
1. On your Google Drive form manager click "Choose response destination"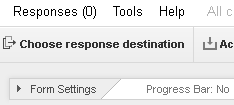
2. Give the spreadsheet a new name(Sheet1, Sheet2 etc.) and hit save
3. Thus you can check your email notifications going to spread sheet destination
What's Up Next?
As we started writing on Google docs and this one is going to be a test drive also you may call it an experimental post. Whatever we planned our next posts on these sequences and we're trying to clarify every tech tutorial with complete comprehensible mode so that newbies will fail a zero tolerance of problems and that will be our first priority in this field. Stay connected and leave comments once found error. Your queries will help us to tech you the best in highest authenticated ways. Cheers!


I don't get a "view page source" option when I right click on step 3
ReplyDelete