How many of people in this universe use Google search? − do have any idea? Well let me explain, a recently published infographic by statista has shown "In December, 77 percent of the 1.52 billion search engine users worldwide conducted with Google search at least once a day. That means 1.17 billion Google users, as opposed to 293 million users of Chinese search giant Baidu and 292 million users of Yahoo's search. Microsoft's Bing also cover 267 million searches and Russian search boss Yandex cover 74 million searches each month." By the above statistics it's quite clear that the domination of Google in search engines competition is too strong and far away to reach for other competitors. So if you're like me to get daily doze of tips, tricks, news, and information from Google search then don't you think you should use Google more productively, personally and securely.

Related Article: How to Get More Out of Google Searches ~ Infographic
Of course, right not? So today's of my article I will show you 11 awesome ways to use Google search preferences and get more out of Google search.
1. Change your location on Google
When you're searching on Google the search giant delivers most relevant results near to your location. Suppose you're based on Seattle, so when you search for coffee shops you will see ones that are nearby. Location can be easily updated and set to another.Change your location on Computer
- Do a search on Google
- Now click on Search tools
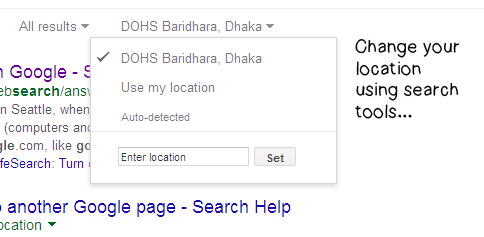
- There you can choose country as any country or your default country, time as any time, past hour, past 24 hours, all results or reading level (basic, intermediate or advanced) then click on your default location. On small empty box says "Enter location" type your desired location and click on "Set", that's it.
Change your location on Phone browser
First of all make sure your phone is sharing your location with Google, if aren't sharing location your phone's location with Google, you may see a message says "Location unavailable."Android
- Open the Settings app .
- Touch Location.
- Make sure "Location" is switched to ON.
- Open the Settings app .
- Touch Privacy > Location Services.
- Make sure "Location Services" is switched to ON.
You have successfully enabled "Location" on Google search with your mobile device, now to update or change location use the method described above.
2. SafeSearch filters
The SafeSearch mode actually works to filter explicit content like porn, nudity, sex, etc. out from your search results. To enable SafeSearch Filters please do following- Do a search on Google
- Now click on gear icon
 (right top - just below your profile image)
 - Now check the button says "Filter explicit results"
- Save the settings and you're done.

Lock SafeSearch
Lock SafeSearch mode poses extra security upon your SafeSearch, suppose if anyone using your computer he/she might want to switch off SafeSearch mode but if Lock SafeSearch mode is enabled then that person is unable to do it. To lock SafeSearch mode please do followingI think you're still on "Search Settings" page so from there click on Lock SafeSearch link
- Now you have to sign in your account and you'll be redirected to SafeSearch Filtering page
- Simply click on "Lock SafeSearch" button and the crawler will start locking safesearch across all Google Domains

When done! back to Search settings and you have successfully locked SafeSearch on your computer
Note: If you want to unlock SafeSearch then click on "Unlock SafeSearch" −> Sign in your account −> Click on "Unlock SafeSearch" −> Crawler will unlock all the domains to unlock −> You're done!
3. Google Instant Predictions
This feature normally works to show Instant results which is default as "maximum 10 results" on each page for individual search query. The setting is default as "Always show Instant results" but you can make this personalized by choosing "Never show Instant results." Then you have to choose "Results per page" which allows you to setup "maximum 100 results" per page though this will seriously slowdown your computer.In case of choosing custom search results it's recommended to choose "maximum 20 - 30 results" per page which won't reduce your browsing speed more significantly.
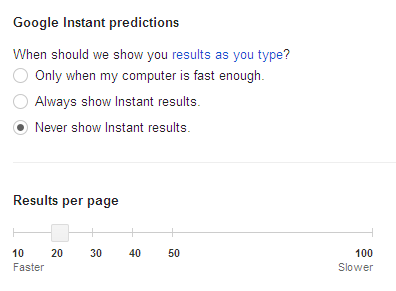
Finally click "Save" and you're done
4. Private results
Private results help you to find more relevant content for you, including content and connections that only you can see. Suppose your Google+ profile page may appear on search results, or other peoples/brands Google+ page may appear those you're following. So to hide these private results and allow Google to show industry based results you can disable this option under Private results.Choose "Do not use private results" under "Private results" and save the settings.

5. Where results open
This option allows you to open each search result's link with new window of your browser. Simply check "Open each selected result in a new browser window." and save your settings.
6. Search history
Search history is a collaboration of all your search archives including Web search, Images Search, News, Shopping, Videos, Maps, Blogs, Books, Visual Search, Travel, Finance etc. This covers an activity of "Total Google searches" through out the whole period on your computer or mobile device. You can find out any search result of any certain date by using "Google Search History"On Google Search Settings page you will see "Search history" at the bottom of the page. There is a link says "search history" simply click on it and sing in your account.
Now you will see something appearance like this:
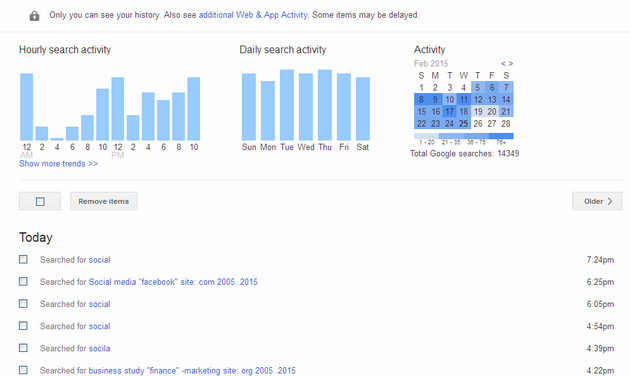
The first demography shows "Hourly search activity" which is how many searches are done per hour. Second one is "Daily search activity" which also shows the search volume per day. Next one is "Activity," this is important as by clicking on any date you will get the search results of that specific date. There are two arrow symbols (left arrow, right arrow) allows to change calender.
There is another important option "Show more trends" which covers Top clicks, Top queries and Top sites are being searched over and over time.
Anyway there are some certain things you can do with "Search History" such as:
Remove Items:
To remove any item simply check the box and click on Remove items, or you can remove all the items by checking one single box above the date and hit on Remove items. You can also navigate to Older and Newest search queries.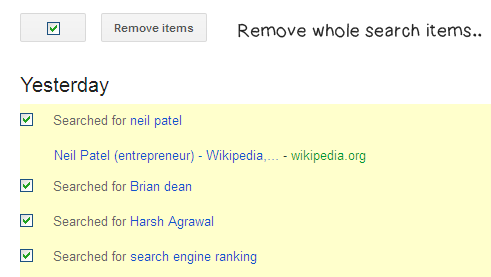
Remove Items by Specific time
To remove items by hour click on gear boxNow choose Remove items as: the past hours, past day, past week, past 4 weeks or the beginning of time and click Remove button

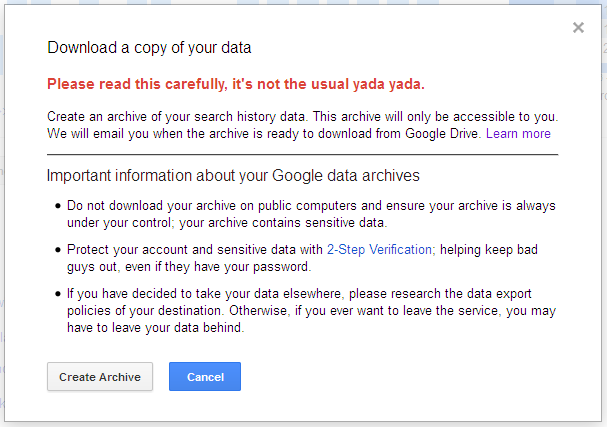
Download Your Archive with Google Drive
Create an archive of your search history data. This archive will only be accessible to you. When your archive is ready to download from Google Drive you will be mailed automatically by Google.Note: This is recommended that you do not download your archive on public computers and ensure your archive is always under your control; your archive contains sensitive data.
To download your search archive click on gear box
Now click on "Create Archive" and Google will email you when the archive is ready to download.
7. Languages
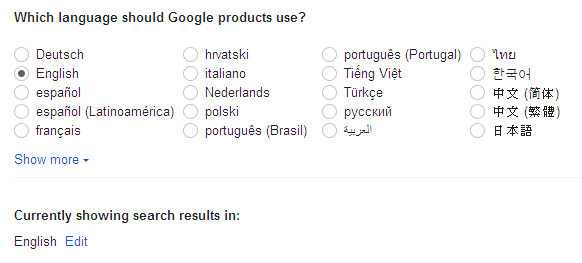
By configuring this option you can make Google search more and more personalized. Since Google supports 152 more languages to deliver search results and you can change language to your default country language so that yo don't have to struggle with English language if you're weak in it.To setup new language with Google simply do following
- Do a simple search on Google
- Click on gear button
 and choose Languages
 - Now click on show more and check your country language
- Finally click save and you're done!
8. Advanced Search
The advanced search option allows you to perform more advanced curative search across Google domains. To perform Advanced search simply do following:Do a simple search on Google
Now click on gear icon
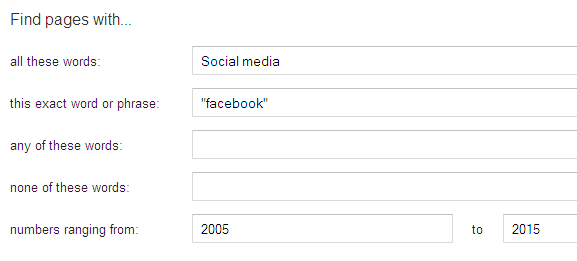
Find pages with...
All these words: Type your search query here with one sentence i.e. Social mediaThis exact word or phrase: Put exact words in quotes i.e. "facebook"
Any of these words: You may leave this default
None of these words: Type minus ( - ) before any word you don't want result for.
Numbers ranging from: Type accurate measurement according to your search queries i.e. for facebook I have chosen the year 2005 to 2015 for search results. If your search string is material related then use weight i.e. 10kg to 25 kg, or if it's money related then use $100 to $200 or £300 to £500 signs. for getting more accurate results.
Then narrow your results by...
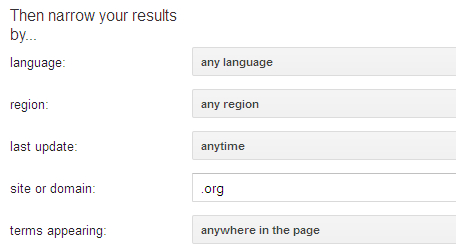
Here you can make changes to:Language: Any language
Region: Any region
Last update: Anytime
Site or domain: Search one site (like wikipedia.org ) or limit your results to a domain like .edu, .org or .gov
Leave other settings default and then hit "Advanced Search"
9. "Ok Google" and voice search
You can use your voice on the Google app or Chrome to do things like search, get directions, and create reminders. For example, say "Ok Google" do I need an umbrella tomorrow" to see if there's rain in the weather forecast. To know how to do voice search read this article at Google support10. Add an image to Google
To include a picture in Google search results first of all you have to add your image to a website along with descriptive text for your image. As Google bot can crawl images that are optimized for SEO with appropriate file format .jpg, .png, .gif etc. with filename, have alt tag enabled. After publishing your article Google bot crawls your page as a raw HTML document including all the resources text, images, quotes, tags, headings, videos and so on.These images can be found later on Google Images. You can manually upload images to Google images hosting site called Picasaweb or there are several attempts to get your images found on Google images
- Upload images to any blogger site that is also synced with Picasaweb
- Create a Google+ page and upload images
- Create a website under Google sites and upload images
11. Remove an image from Google
To remove an image from Google search results page simple remove your images from your website's or blog's page. If you want to remove images that violate your personal brand or property and that are not controlled by you so you can complaint Google or file a DMCA about this issue.Read elaborate guide from Google support center.
Videos to help with the Google Search basics
Conclusion
I have tried my best to represent you a basic guide with primary, intermediate and advanced features of Google search preferences. I think now you can make your Google search more productive and personalized. Help this post to grow up by sharing with your other friendsImage: freedigitalphotes.net


Hi
ReplyDeleteThis is one of the in depth article about google search preference in simple language
You have made it clear with images and video. Always love to hear from your end with fresh and relevant content