Google's new terminology to fetch more flexible and search user friendly data in search results brings webmasters to be more intellectual and internet power based. Google can now display authors profile name with byline "By John Doe" also the profile picture with each link. Google's previous features shown profile picture next to stories that you may have written. The picture will in
turn link to your Google Profile page.
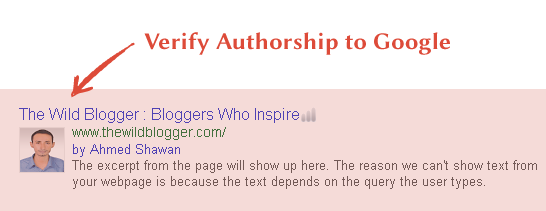
As a content creator it's too important feature for you since you can now indirectly claim authorship of your content on Google SERPs. There is the advantage of author as well - your Google CTRs will improve improve. That might be happened because people are inheritedly familiar with traditional search results having links, texts and some description but search results with some visual element(the author’s photograph) which is fastened by Google can attract more and more people.

As a content creator it's too important feature for you since you can now indirectly claim authorship of your content on Google SERPs. There is the advantage of author as well - your Google CTRs will improve improve. That might be happened because people are inheritedly familiar with traditional search results having links, texts and some description but search results with some visual element(the author’s photograph) which is fastened by Google can attract more and more people.
Method #1: Adding Google+ Profile Badge on Homepage
This method is very easy and everyone can apply to verify authorship to Google. The process now works far better than verifying with email. Please go through the following instructions and make it handly- Go to Google Developers page
- Now choose your badge specially pick up landscape format and keep the width 300px (an ideal size)
- Now select and copy the snippet
- Now go to Blogger -> Page Layout
- Click on Add a Gadget link and choose blogger default HTML/JavaScript functionality
- Simply paste your copied code inside and save it on top of your sidebar
- Finally save arrangements and you're almost done!
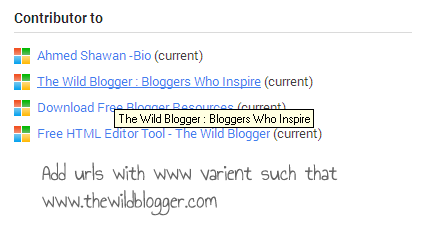
#1.a Add Contributor To
The "Contributor To" section of your Google+ profile must have the
proper URLs of the sites you currently contribute to. You have to add all your links(you currently contributing the sites) with www.yoursite.com format. You have to add a public link to the domain of the email address to the Contributor to section of your profile. Look below how to add contributor links
Method #2: Email Verification Method
This method is application once you have a verified custom email address according to your domain name. For examplewww.thewildblogger.com is our domain name
and my custom email is info@thewildblogger.com
So both of the formats include thewildblogger.com. This kind of domain google accepts and enlists as verified domain if you can verify your email with your Google plus profile.
To verify your email address you have to go Contact Information section of your profile, which by default is viewable only by your circles. Add the following circumstances Phone, Email, Address and save this section. You can keep your email private if you wish.
#2.a Add Contributor To
Do the things like before but only one thing you have to add extra that is your email. On the URL box add your email link and save it.
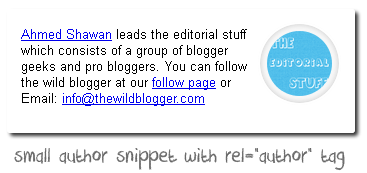
#2.b Add Mailto Tag Within Author Snippet on Homepage
Instead of modifying HTML templates, you can just include your name and email address on a web page (using the mailto syntax) and Google will automatically connect it to your Google Profile. Here’s how:Option 1: Use both email address and name together<a href="mailto:info@thewildblbogger.com">Ahmed Shawan</a>Option 2: Link the author's name to his Google+ pageSend <a href="http://plus.google.com/106741792188008796695">Ahmed Shawan</a> an email at<a href="mailto:info@thewildblbogger.com">info@thewildblbogger.com</a>
The important point is that all web pages, that you have authored,
should include your name and your “work” email address that you
previously verified in Google Plus. That is the only signal Google can
use to verify your content ownership. See our homepage author profile with mailto tag
#2.c Create an About Page
An about page that will include your bio, something about your blog also the most important your Google Profile link with rel="me" attribute. See below example<a href="//plus.google.com/106741792188008796695" rel="me">My Profile</a>Some of us create problem here since we add rel="author" attribute but this is not enough to verify your own Google Profile. See below image for our about page
Make sure to change 106741792188008796695 with your own Profile ID.
Note: Once you update your Google profile with custom URL then you might not get your old profile ID there but still you've chance to find it. Simply look carefully on your Google+ page badge snippet, it includes your original 21 digits of Profile Id. So grab and use it.

#2.d Claim Your Articles to Google
You
have to claim your articles to Google so that each link will contain
your byline name also Google+ profile photo. See for ours we added a
simple about author section which is visible after each post and
includes some important links that verify the authorship to Google.


So the entire circle should be linked like this
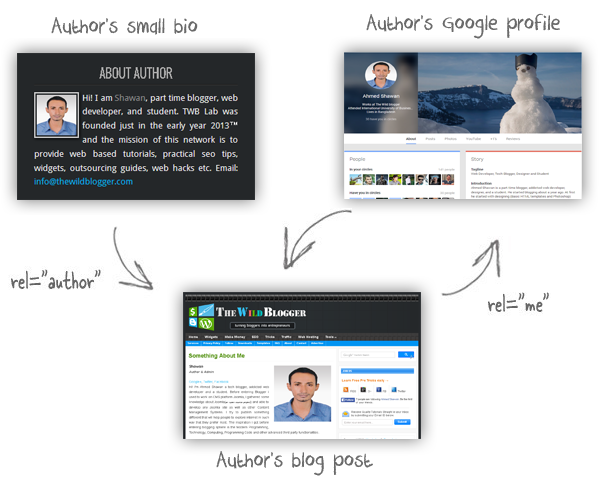
Looks like it? The good news is that implementing authorship markup into a site is extremely simple and the whole thing should not take more than a few minutes.
Testing of Authorship Verification
To test that you've verified authorship you have to do a little more
- Go to Google Rich Snippet Tools
- Type your domain and hit Preview button
- You should see your authorship has been successfully verified message, looks like this
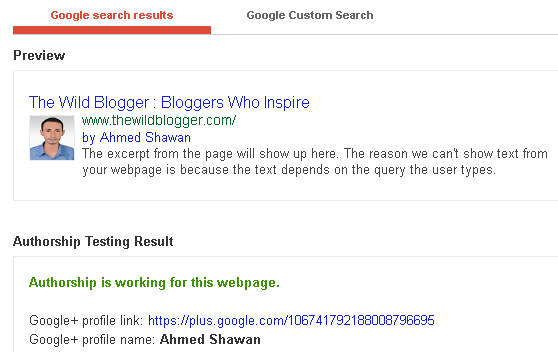
Troubleshooting tips:
If Google is still not willing to display your profile picture in search pages, here are some things you can try:- Make sure your author page is complete with a (250 x 250)pixels picture, you have written a bio and that you have linked to your other social profiles. Also, the author page should be on the same domain as your articles /stories. Never link any url with rel="nofollow" or similar attributes
- Your Google Profile should also be complete with your bio and include links to your own site as well as your other online profiles.
- Google will pick the picture thumbnail from your Google Profile page and thus use an actual picture of yourself (not an icon). The picture should look good even when compressed into a 50×50 thumbnail image.


0 comments